參考資料:
Johnny Chung Lee的專題網站 http://johnnylee.net/projects/wii/
Ubuntu Linux下如何安裝WII mote電子白板 http://blog.lyps.chc.edu.tw/blog-mu/cses/2009/05/05/ubuntu-linux下如何安裝wii-mote電子白板/
如何在班級教室實做wiimote whiteboard http://media.ttes.ntct.edu.tw/blog/?p=947
實作Wiimote互動電子白板 http://blog.xuite.net/pearlmin/moon/21061762
HOWTO: Wii remote in Ubuntu 8.04 http://ubuntuforums.org/showthread.php?t=836231
電子白板的討論 http://project.cses.chc.edu.tw/moodle/course/view.php?id=7
第二代使用法:
使用Wiimote製作互動白板(電子白板)
介紹及原理
2007年12月,由美國卡內基大學博士班的學生Johnny Chung Lee,發表了『Low-Cost Multi-point Interactive Whiteboards Using the Wiimote』這篇文章,在網路上引起了極大的迴響及討論。(http://johnnylee.net/projects/wii/)
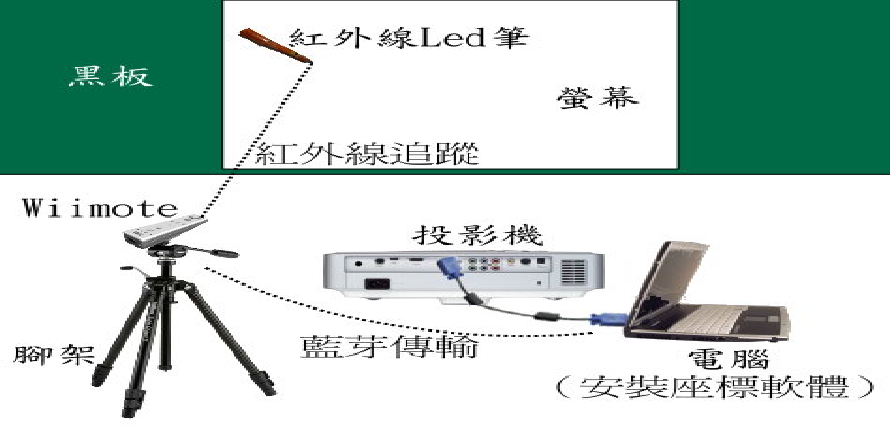
原本Wii遊戲機的設計是讓Wiimote移動,感應條紅外線光源不動當成參考點。Lee反其道而行,將Wiimote放在可以監看到整個螢幕的位置後固定不動,移動紅外線發射的Led筆,讓Wiimote追蹤其光點,再用藍牙無線跟電腦連線。
需要裝置
藍芽接收裝置x 1
Wiimote x 1
紅外線筆x 1
投影機x 1
需要安裝的軟體
白板定位軟體 whiteboard_0.3.4.2-2ubuntu3_i386.deb
WII函式庫 libcwiid1
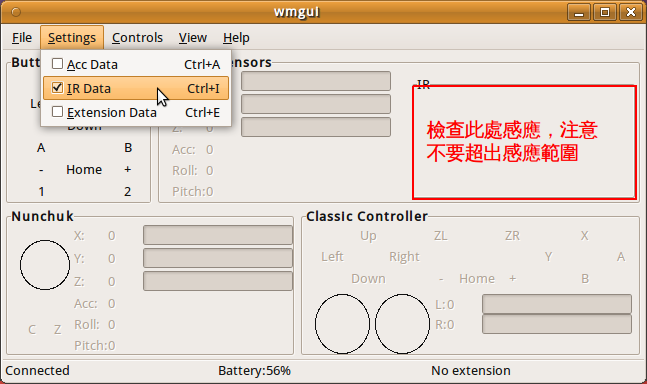
WII偵測程式 wmgui
WII操作程式 wminput
ubuntu安裝說明
1.按照之前所說的方式安裝libcwiid1 wmgui wminput
2.到 http://code.google.com/p/linux-whiteboard 下載 whiteboard_0.3.4.2-2ubuntu3_i386.deb
3.使用檔案瀏覽器,點選 whiteboard_0.3.4.2-2ubuntu3_i386.deb ,使用GDebi套件安裝程式安裝
4.若有相依性問題,使用終端機apt-get -f install
啟動步驟
(圖片取自http://blog.xuite.net/pearlmin/moon/21061762)
1.使用Wmgui,調整Wiimote,讓紅外線筆點在四個角落都能感應到
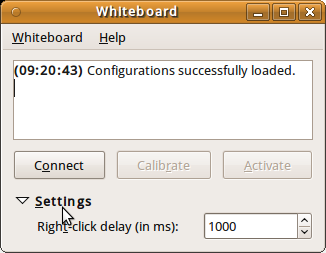
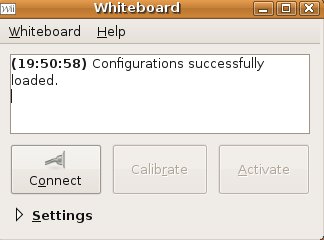
2.啟動白板定位軟體「應用程式」→「附屬應用程式」→「Wiimote Whiteboard」
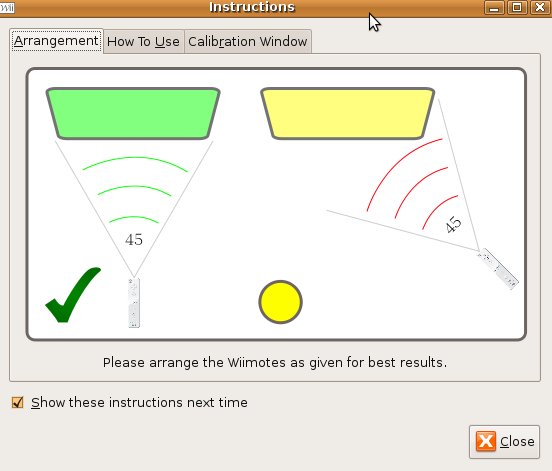
3.出現介紹畫面,按關閉(close)即可
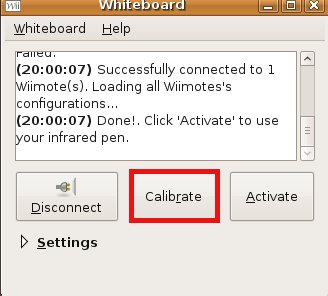
4.下一步,請按連接(connect)按鈕,準備進行和wiimote連接
 →→
→→
5.完成連接後,接下來按下畫面定位程式(calibrate)
6.使用紅外線筆,依序在左上,右上,右下,左下這四個方向,啟動紅外線LED,完成定位程序
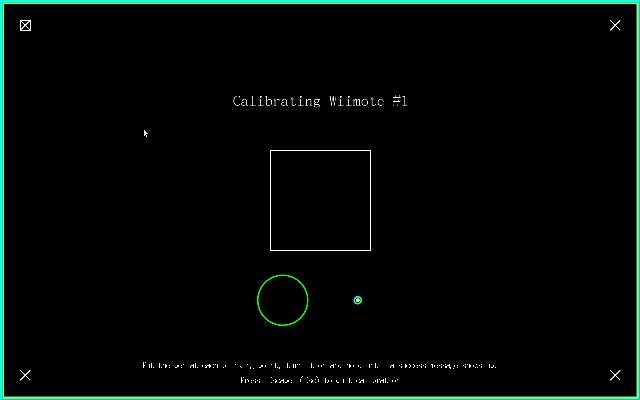
7.定位程序設定完成後,就可以按啟用(Activate),開始利用紅外線筆來控制游標了
8.滑鼠右鍵:在同一位置停止不動一~二秒即可啟動右鍵選單